
Take folders and comping
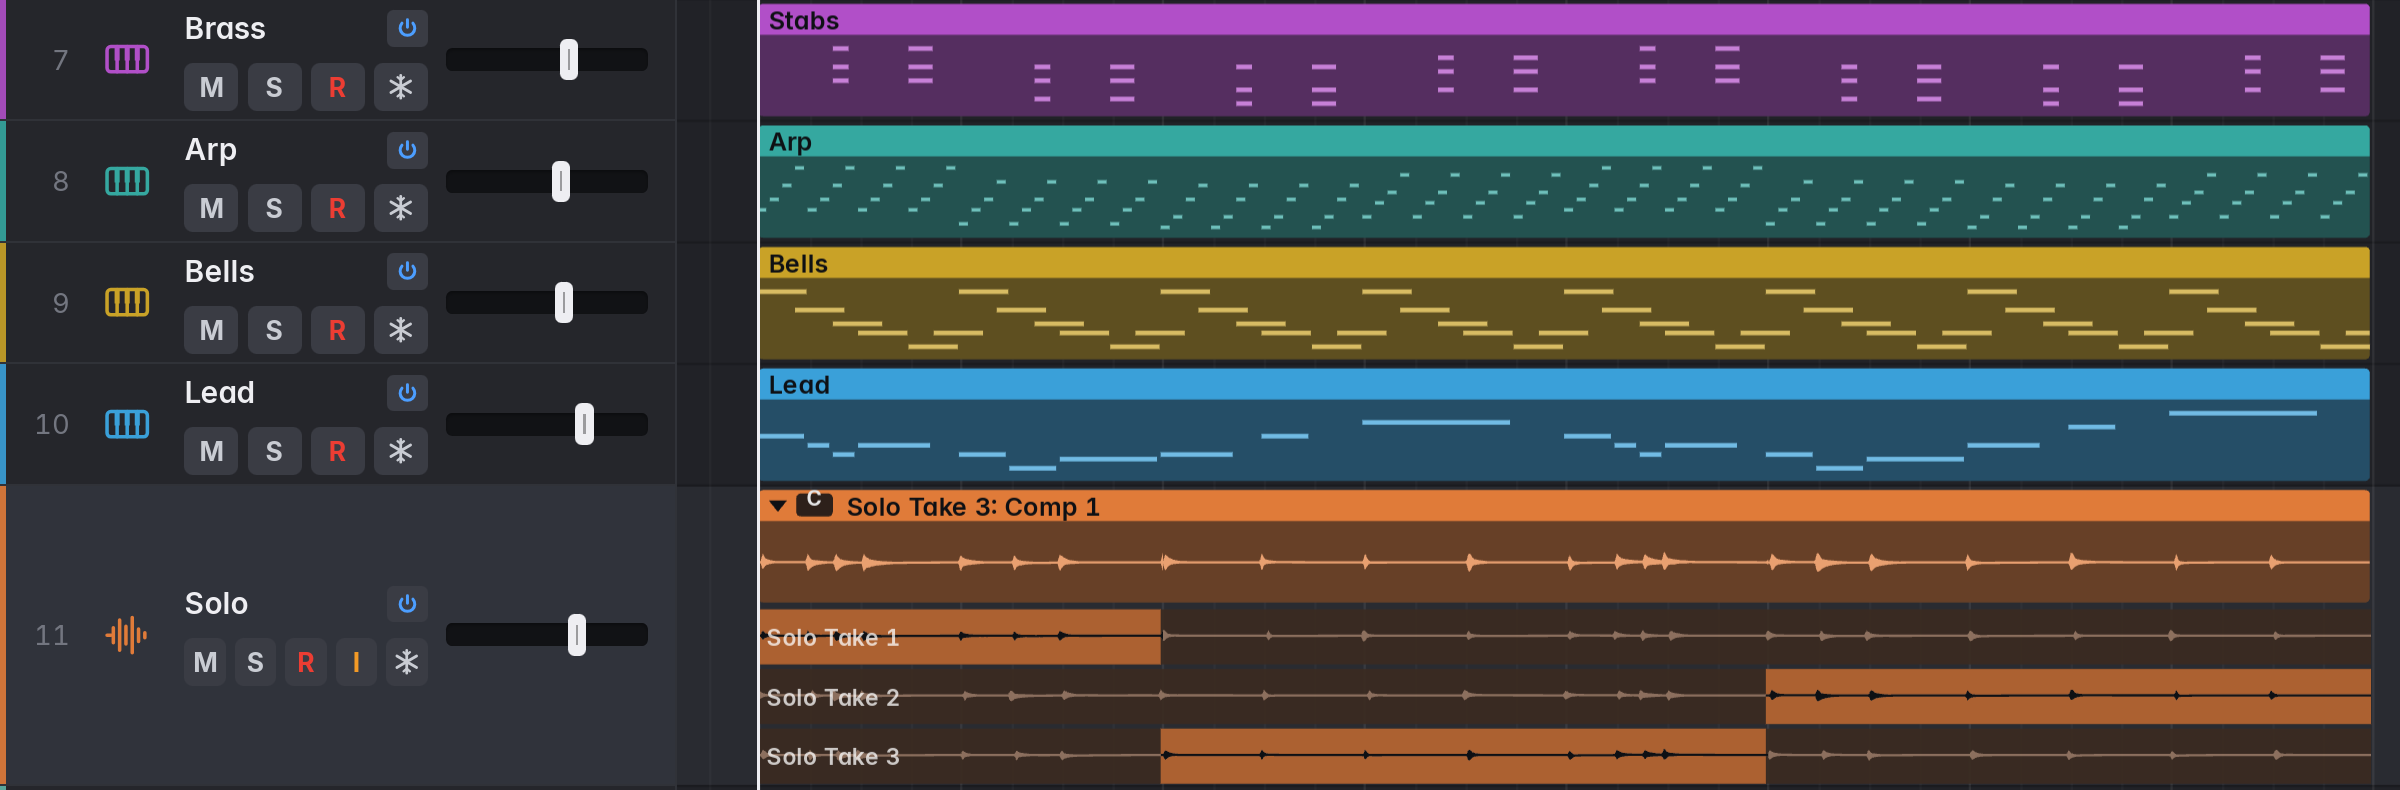
Take folders follow Logic’s Quick Swipe Comping.
- Making one. Record with Cycle on (each pass becomes a take), or select several audio regions on one track and choose Pack Take Folder (Ctrl+F on Linux and Windows, Control+⌘F on macOS; also in the Edit and region menus): one take per region.
- The comp. A folder plays its comp: which take is heard where. A new folder starts with the newest take, older takes filling in where it has no audio. Where one take hands over to another they crossfade over the Crossfade Time (Settings › Editing, 20 ms equal power by default), so boundaries don’t click.
- Several comps. A folder can keep several comps and switch between them, as in Logic. The take folder menu lists them (the one heard is ticked; choose another to hear it), with Create New Comp (a fresh comp: the newest take wherever it has audio), Duplicate Comp (a copy of the comp heard, to try changes on), Rename Comp… and Delete Comp (the last comp stays). Comps are named Comp 1, Comp 2 and so on. Swipes change the comp heard; Flatten, Flatten and Merge and Unpack use it. The folder’s name bar shows the comp’s name (or the take’s, when one take plays throughout).
- Opening a folder. Click the disclosure triangle at the start of the folder’s name bar. The track grows by one row per take below its lane. The badge next to the triangle shows the take heard (or C for a comp).
- Comping.
- Drag across a take row to put that stretch of the take into the comp (snapped to the grid). Comp parts are drawn bright and the rest dimmed; the closed folder draws the comp’s waveform.
- Click a take row to hear that take throughout.
- The take folder menu (click the badge, right-click a take row, or region menu › Take Folder): the takes (pick one to hear), Open / Close Take Folder, Rename Take, Delete Take, Delete Unused Takes, Flatten (the comp becomes ordinary regions, one per stretch), Flatten and Merge (the comp is rendered to one new audio file), and Unpack to New Tracks (every take on its own new, muted track, and the comp flattened in place).
- A folder moves, trims, splits, loops, fades, crossfades and changes gain like any audio region. Every comp edit can be undone, folders are saved with the project, and bounces, exports and Bounce in Place render the comp.
- MIDI take folders. With Settings › Recording › Overlapping Recordings › MIDI set to Create take folders, each pass of a MIDI cycle recording becomes a take (passes where nothing was played are left out), and recording over MIDI regions packs them into a folder with the new take; recording over a MIDI take folder adds takes to it. As in Logic, a MIDI folder plays one whole take: click a take row or choose it in the take folder menu (there is no swipe comping and no comp list). Editing the folder’s notes edits that take. Flatten leaves a plain region of the take heard, Unpack to New Tracks puts every take on its own muted track. The control bar’s Replace button wins: with it on, a recording replaces what it overlaps instead.